Everyone here who has "been there and done this" and posted their information and experiences ... and photos...
A Million Thank You's for making it all pretty straight forward and easy.
There are multiple posts about this subject here, with lots of good photos.
I want to take a few minutes and document what parts I used, photos of the install and some tools needed to convert from Military to Civilian parts.
This was done on October 19th and 20th 2013, and everything was available either off the shelf, or the next morning at O'Rileys.
Well worth going through the Brakes. I have to say.
There are numerous tricks and particular ways to install them , that have to be done right... or You just cant stop 5 quarter tons.
Bottom line up front. M 715 stock axles and brakes:
Switch to Civilian Wheel Cylinders.
Switch to Civilian Brake Shoes.
Switch to Civilian Brake Springs and Hold Down Pins. ( shoes require slight modifications )
Primary Shoe ( the forward shoe ) is the SHORT SHOE. ( goes to the Front of the axle )
Install the Primary Shoe return spring FIRST on the hold down pin.
( So this spring is closest to the wheel cylinder )
The Star Adjuster on the Drivers side faces Forward.
The Star Adjuster on the Pass Side Faces Rearward.
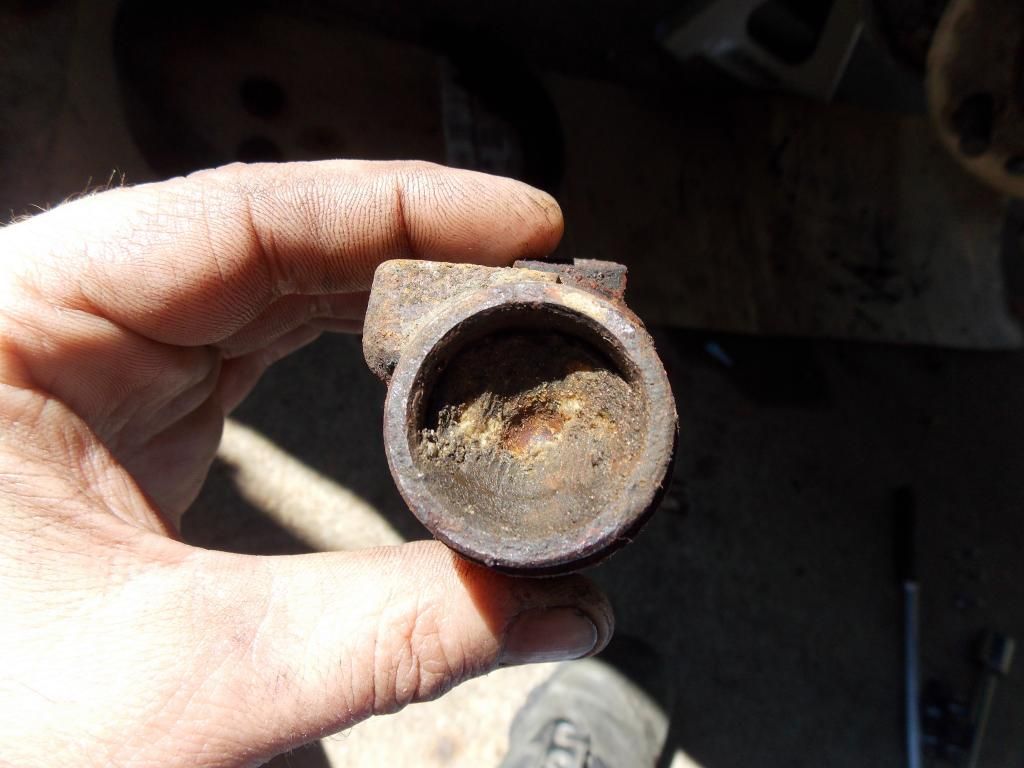
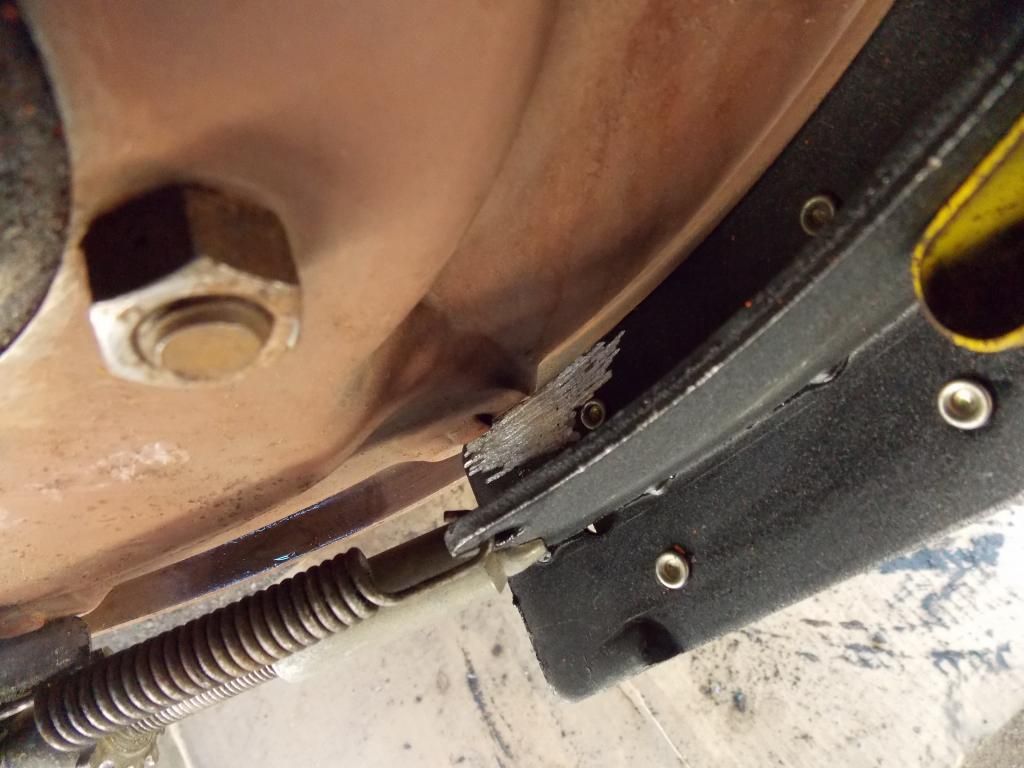
If Your Brakes or wheel cylinders look like this.....
Houston... We have a Problem.
Start by loosening up the lug nuts slightly, jacking up the axle and using JACK STANDS that are of good quality and wont slip.
I leave the jack under there too, just making contact after the weight is on the jack stands.
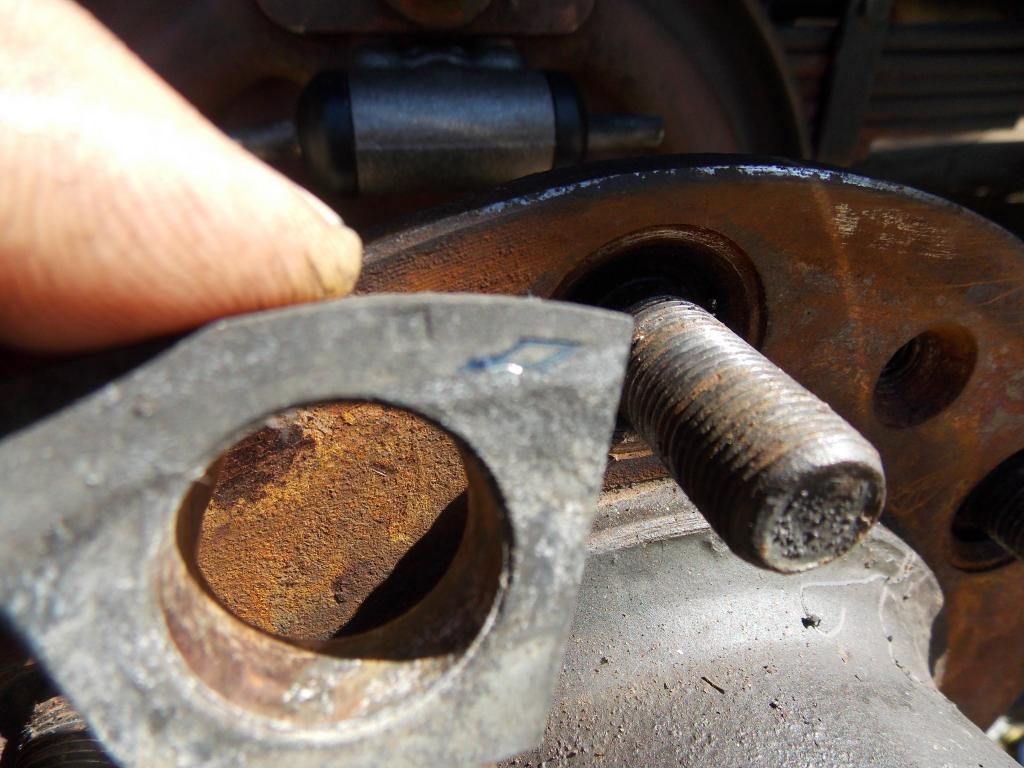
Then, remove a tire... and find the three straight blade screwdriver bolts holding the drum to the hub.
Some are stuck... Tighten first, then try to loosen them.
Some say drill them and they loosen up. Some Say Impact Screwdriver.
Then You are left with this:
[URL=http://s1279.photobucket.com/user/Blitz777/media/Brakes014_zps13fe4342.jpg.html]
And You will want to replace those with new ones:
( These came out of My Grandfathers tool box, but Im sure they are at Lowes or Home Depot ) Longer is OK... Grease them so they dont stick in the future.
[URL=http://s1279.photobucket.com/user/Blitz777/media/Brakes013_zps8aa6e99f.jpg.html]
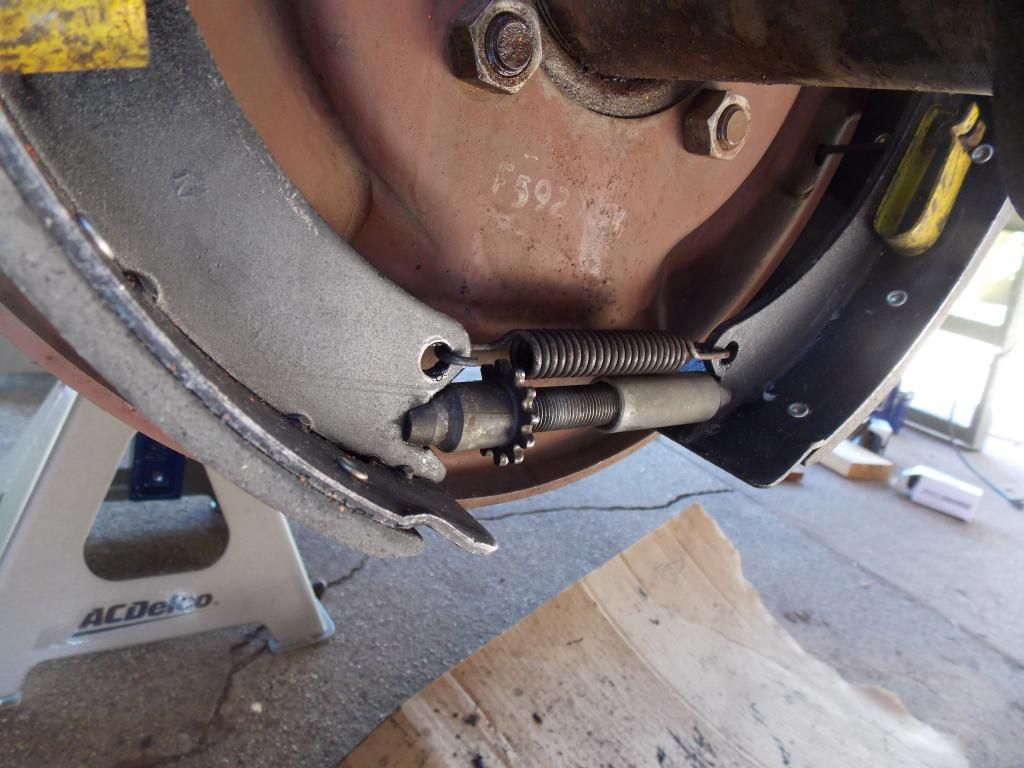
Once the three slotted bolts are out, you may have to loosen the star adjuster to remove the Hub.
On My truck, turning the adjuster Star UP loosens the brakes.
Turning it down, expands them against the drum.
There is a slot on the brake backing plate that You can use to loosen the Star Adjuster. ( Daylight behind the Spring )
[URL=http://s1279.photobucket.com/user/Blitz777/media/Brakes012_zpse193444b.jpg.html]
When You can pull the Drum off, beware of the asbestos Dust.
Diameter 13 inches ( tape butting other side )
[URL=http://s1279.photobucket.com/user/Blitz777/media/Brakes034_zpse37def5d.jpg.html]
Drum Thickness ( on my truck ) 0.35 inches.
I dont know the minimum thickness for serviceability.
[URL=http://s1279.photobucket.com/user/Blitz777/media/Brakes032_zpscd2cea2f.jpg.html]
[URL=http://s1279.photobucket.com/user/Blitz777/media/Brakes039_zpsd438a2cb.jpg.html]
[URL=http://s1279.photobucket.com/user/Blitz777/media/Brakes067_zpsd9ec25f3.jpg.html]
Brake Shoe Size is 13 x 2.5 inches:
[URL=http://s1279.photobucket.com/user/Blitz777/media/Brakes040_zps18377498.jpg.html]
Brake Shoes Before Modification :
[URL=http://s1279.photobucket.com/user/Blitz777/media/Brakes042_zps4c7f4b4c.jpg.html]L]
Check the Drum for wear and grooves, clean it, degrease it, and set it aside.
NOTICE HOW YOUR BRAKE SHOES AND HARDWARE ARE INSTALLED BEFORE YOU REMOVE THEM.
The proper way is shown here as follows, but finding an incorrect previous installation my explain some brake issues to You that You may have experienced, and can now correct.
Make a Quick drawing, showing the spring positions, which one is over the other spring, the star adjuster position, the Primary ( short shoe ) and the Secondary ( longer Shoe ) positions.
The Shorter Shoe ( Primary )Should be on the FORWARD side of the Axle, and the Primary return Spring UNDER the Secondary Spring.
Make Sure the adjusting Block at the top has the ARROW pointing forward.
If You do all of this Before You start.... As You complete the New Brakes Installation, you might feel a lot better than just new Shoes and Springs and Wheel Cylinders as far as "confidence" in your stopping ability.
You may find brake fluid, asbestos powder, grit, grime and maybe a dead Scorpion in there... but its all gonna get cleaned... so Make Notes and Pull everything apart and lay the parts out on the ground in the same position they came off.
Here is a Photo of All of the New Parts you will need ( except Brake Fluid)
Everything was available at O Rileys Auto parts.
Some on the shelf, some the next morning.
This shows TWO Wheel Cylinders Enough for ONE Axle.
You need 4 For the Entire Truck.
One Set of Brake Shoes is shown. ( One Axle )
Two sets required to do the Entire truck.
Etc.... Springs, and set screws and hold in Pins.
Double Everything for the 2nd Axle.
[URL=http://s1279.photobucket.com/user/Blitz777/media/Brakes001_zps8446d3a3.jpg.html]
[URL=http://s1279.photobucket.com/user/Blitz777/media/Brakes031_zpsb2aedc4b.jpg.html]
New Springs ( Orange ) 2 per side, 8 total for Entire Truck.
( 4 come in ONE Box )
Old Springs ( Grease colored bottom )
[URL=http://s1279.photobucket.com/user/Blitz777/media/Brakes021_zpsf90ec313.jpg.html]
# 451 Friction Linings ( Brake Shoes )
Notice how they are two different lengths of the linings.
The Shorter Shoe is the Primary Shoe and Goes FORWARD.
[URL=http://s1279.photobucket.com/user/Blitz777/media/Brakes016_zps82a41131.jpg.html]
Before Modification:
Drivers Side, Primary Shoe is on the left ( goes Forward ):
[URL=http://s1279.photobucket.com/user/Blitz777/media/Brakes042_zps4c7f4b4c.jpg.html]
Now the Fun begins.
After you have removed everything and cleaned the brake backing plate, its time to remove the wheel cylinder. ( Tight Space and a 1/2 inch open end wrench )
Pull the wheel cylinder forward slightly after the two retaining bolts are removed, to get access to the brake line.
On a STOCK M-715, you will probably have a rubber line there.
My Truck already had new steel brake lines installed, but you MAY need to purchase an adapter if you have the rubber lines, to FIT onto the new wheel cylinders.
I dont have that part number handy, but its a NAPA part and I have read it here, on another post.
Most say to go ahead and replace all of the rubber lines and steel lines when you do the retrofit, because most of that stuff You will find is original.( Gunny already did that part before I bought the Truck )
When I find my notes about these adapters, ( in my receipt pile )I will post the part numbers in a later comment, for the replacement rubber lines and the adapters alone.
What I suggest you do now is, make sure there is brake fluid in the reservoir... and the cap is off, and you have extra brake fluid handy.
Quickly remove the hose or steel line from the old wheel cylinder ( brake fluid will run out ) and quickly swap wheel cylinders, putting the rubber line or steel line onto the new cylinder "with out" mounting it in the brake backing plate holes.
This will stop the brake fluid from running all over and allow you to begin the modification.
I did not take photos of this part... its pretty straight forward.
The New wheel cylinders need about a half a bolt width bigger holes and a tiny bit lower than the stock holes to mount up.
With the wheel cylinder hanging there, you can access the holes with the handy dandy Space Shuttle Door Gunner Tool... the Dremel.
The bits number 952 are exactly what you need to elongate the existing holes. This is a perfect tool for this job.
[URL=http://s1279.photobucket.com/user/Blitz777/media/Brakes026_zpse8b3518c.jpg.html]
[URL=http://s1279.photobucket.com/user/Blitz777/media/Brakes027_zps93ea9c86.jpg.html]
Figure one BIT per side, so 4 BITS for the entire truck.
They wear down nicely, as soon as the hole is the right size and position.
( when I do the fronts, I will photograph this , but You will see , its a very small amount. )
Good Photos HERE and a thread:
http://www.m715zone.com/vb/showthrea...der+conversion
Once the holes are properly modified, Mount the wheel cylinder with the 1/2 inch retaining bolts from behind the brake backing plate.
Make sure the brake line is tight, and does not spin on the fitting, so there will be no leaks .( You still have to bleed the brakes when you are done !!).
Install the ( cleaned original )push rods on each side of the wheel cylinder.
Now its time to modify the shoes.
Remember, the Short Shoe is Primary, and Goes forward.
When You are grinding on the shoes, this will be important and it switches when you are on the other side of the truck.
Take your old brake shoes, making sure they HAD BEEN installed properly, and find the Primary Shoe ( short Shoe )
Find a NEW Primary Shoe.
Stack these two shoes on top of each other, steel to steel... ignoring the depth of the new brake shoe lining. Align Steel to steel, with the OLD SHOE on top:
[URL=http://s1279.photobucket.com/user/Blitz777/media/Brakes045_zps66bedac5.jpg.html]
[URL=http://s1279.photobucket.com/user/Blitz777/media/Brakes044_zps159f1106.jpg.html]
Looking straight down, over the old shoe, take Your Handy Dandy Space Shuttle Door Gunners Tool, The Dremel, with a CUTTING WHEEL on it.
You better figure TWO Cutting Wheels PER SIDE of each axle.
8 Cutting wheels for the entire Truck.
[URL=http://s1279.photobucket.com/user/Blitz777/media/Brakes028_zps4ce8d365.jpg.html]
Sight down and line up the Cutting Tool with the top of the old brake shoe, scribing a line on the NEW brake shoe where it needs to be CUT OFF.
[URL=http://s1279.photobucket.com/user/Blitz777/media/Brakes046_zps077bcc5c.jpg.html]
[URL=http://s1279.photobucket.com/user/Blitz777/media/Brakes047_zps89d8e8be.jpg.html]
Go ahead and cut that part off. ( WEAR EYE PROTECTION)
It should be about 1/2 inch... plus a little.
I measured .57 inches and .60 inches after I cut.
[URL=http://s1279.photobucket.com/user/Blitz777/media/Brakes048_zps75a6f895.jpg.html]
[URL=http://s1279.photobucket.com/user/Blitz777/media/Brakes049_zpsdbf8d674.jpg.html]
OTHER SIDE:
[URL=http://s1279.photobucket.com/user/Blitz777/media/Brakes057_zps5e5c3999.jpg.html]
This angle cut, should now match the adjusting block angle, that rides on the center anchor pin at the top. Make sure the cut is "level" and "square" and some slight cutting may be required to clean it up a bit.
Match the secondary shoe up and do the same thing. ( only cut one end of each brake shoe)
Now for the final modification....
place the primary and secondary shoes on the ground under the backing plate, with the primary show forward.
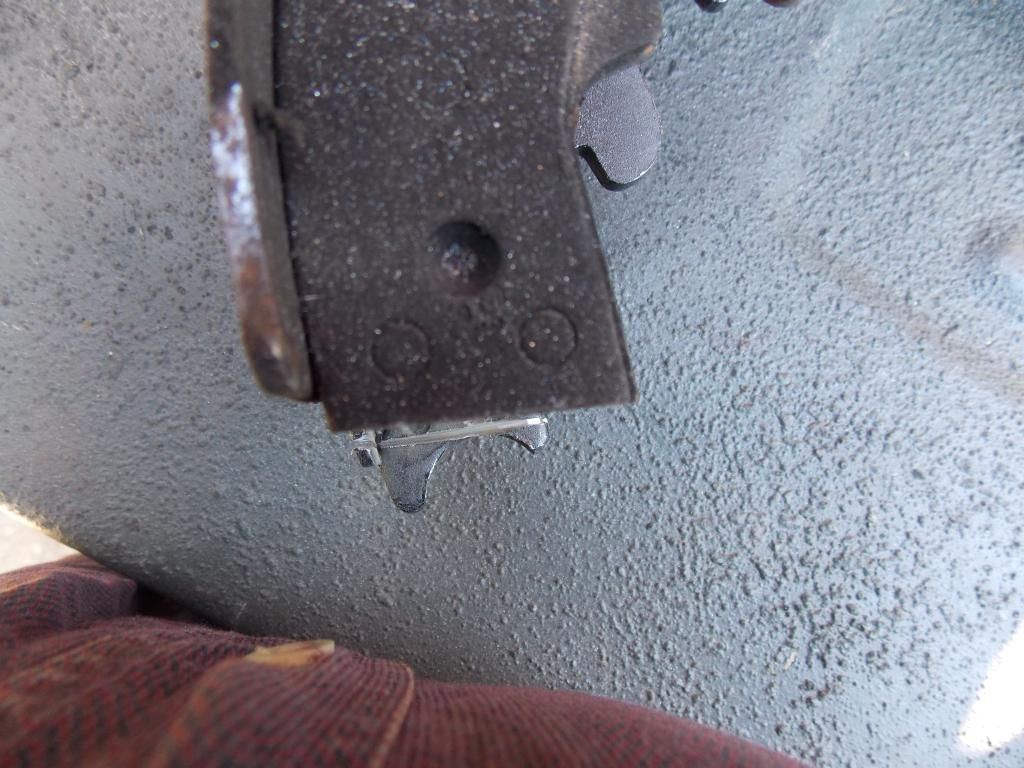
Lift and place one shoe on the backing plate by hand, and notice that the bottom INNER tab on each show will have to be ground flat to mate up to the brake backing plate. You only have to do the INNER bottom part on each shoe:
[URL=http://s1279.photobucket.com/user/Blitz777/media/Brakes050_zpsc7200772.jpg.html]
passenger secondary ( back ) shoe
[URL=http://s1279.photobucket.com/user/Blitz777/media/Brakes052_zpsbaa461d8.jpg.html]
Passenger Primary shoe
[URL=http://s1279.photobucket.com/user/Blitz777/media/Brakes056_zps0f7e8250.jpg.html]
INSTALLED Passenger Primary shoe:
Lather, rinse, repeat...... as needed...
Do 4 shoes for 1 axle, stack, cut, and grind.
Now its time to install the rest of the parts.
Start at the top center, and place the adjusting block on the center anchor stud, with the arrow facing FORWARD:
[URL=http://s1279.photobucket.com/user/Blitz777/media/Brakes004_zpsb526b888.jpg.html]
Place the Primary Shoe onto the backing plate, and install the hold down pin from behind the backing plate.
Press IN with a screwdriver, on the Yellow PIN ANCHORS to lock the pin into place. ( rotate the pin 90 degrees when aligned).: Left in photo, Yellow and Pin.
[URL=http://s1279.photobucket.com/user/Blitz777/media/Brakes058_zps63ec987b.jpg.html]
Do the same for the secondary shoe, making sure the tabs on the brake shoe catch and align in the push rods for the wheel cylinder.
[URL=http://s1279.photobucket.com/user/Blitz777/media/Brakes006_zpscaa5be32.jpg.html]
Install the diamond shaped retaining bar, onto the center anchor stud, in front of the adjusting block.
Now its time for the Springs ( Orange ).
Using a screwdriver, or a brake spring tool ( highly recommended)
anchor the bottom of a New Spring into the anchor hole in the Primary Shoe. Stretch the PRIMARY SHOE SPRING FIRST, and anchor it over the center anchor stud, so it is the closest spring to the wheel cylinder.
Take a screwdriver, and position the anchor plate so it is centered on the stud.
Repeat for the Secondary Shoe ( back shoe ), placing this spring end OVER the first spring.
Passenger side spring placement:
[URL=http://s1279.photobucket.com/user/Blitz777/media/Brakes062_zps041fb00a.jpg.html]
Make sure everything is centered on the brake backing plate, the anchor points, pins, and that the steel of the shoes is sitting properly on the brake backing plate.
[URL=http://s1279.photobucket.com/user/Blitz777/media/Brakes063_zps096de7a7.jpg.html]
Drivers side:
[URL=http://s1279.photobucket.com/user/Blitz777/media/Brakes006_zpscaa5be32.jpg.html]
Clean and exercise the star adjuster assembly.
For the drivers side, the star goes forward.
The Passenger side, the star goes rearward.
Install the star adjuster between the bottom of the brake shoes, and tighten slightly to hold it in place.
Install the old return spring that you saved and cleaned, onto the bottom of the two brake shoes.
[URL=http://s1279.photobucket.com/user/Blitz777/media/Brakes012_zpse193444b.jpg.html]
By turning the star adjuster toward the ground, the brakes will expand and get tighter.
Opposite, turning the star UP will loosen the brakes.
Adjust the brakes up until the drum just slips over the shoes.
Spin the drum by hand a few times, and a little drag here is ok for now.
Do the same for the other side.
Go ahead and install the three hold down screws that hold the drum to the Hub. Tighten in small stages, so the drum pulls up tight.
( We will lube them before completion)
With both drums installed, check the fluid reservoir and make sure there is still fluid in the master cylinder.
If so, gently press on the brake pedal, slowly, and set the brakes to "center" in each drum.
Now go back and rotate the drums a few times, and feel for drag and loose spots.
You should be able to slightly tighten the brakes a bit more now, with the star wheel, until they just start to " brush" on the drum , as you are turning it by hand.
This is when you need an assistant, to help bleed the brakes.
I did it with a vacuum pump and a 2 x 6 wedged into the seat, but I suggest You get someone to help you.
Slowly bleed the brakes, into an approved clear container, with a hose running into the fluid in the bottom of the container. Where You can see the bubbles.
With an assistant, Start on the Passenger rear, and then the drivers rear, then the passenger front, then the drivers front.
Open the bleeder valve slowly, while someone hold down on the brake pedal. When the pressure drops, immediately close the valve.
You can do this about 3 times before you have to add more brake fluid.
Once the brakes are bled, you will feel the difference in the pedal immediately.
Now go back to each drum, make sure they spin freely with very very little drag using the star adjuster as needed.
Check the wheel cylinders , behind each backing plate for any leaks at the brake line fitting, or bleed valve.
Make sure there are no leaks under brake pressure.
Take those three hold in screws back out... give them a little grease on the threads and shoulders, so they dont stick again... and reinstall them, in sequence, tightening a little at a time.
I tool two lug nuts, and tightened them down to hold the drum while I tightened the screws.
Clean Your tires and wheels.
Clean the studs with a small wire brush and I used brake cleaner too.
A very very light coating of wheel bearing grease on the threads may help in the future on the side of the road.
Pick up those heavy ass tires and center them on the hub, and set them on the studs.
Wipe the studs off again ( paint chips will be there )
Install the lug nuts hand tight in sequence.
Double check all the lug nuts are hand tight and in sequence.
Raise the jack, remove the jack stand on that side.
Repeat for other side.
Make sure all dogs, cats and tools are out from under the truck and tires.
Make SURE you refilled the master cylinder and put the top back on and took everything out from under the hood.
Clear Prop, clear the runway... put it in Neutral, try the pedal again ( it should be tight ) and start the truck. Let Her warm up to her new shoes for a minute, and slowly let out the clutch in first gear.
When You are rolling, push the clutch back in and press the brakes.
You should stop.
Try a little at a time a few feet at a time.... and let the brakes set.
Then try reverse and let the brakes set.
If all went well....
You should be good to go for a 10 mph test, then 25 etc...
You will know if it worked or not... just be safe.
So the good thing is....
Brakes are NICE to have in an Old Green Iron.
If you ever need anything in the future, you can get it at the local auto parts store.
You know they were done right and they should last you a few years or steady driving.
Thanks to everyone who has "been there, done that.... got the Tee Shirt "
for posting all of this excellent information.
If it was'nt for You guys... I would still be out there trying to figure it out, or spending 60 bucks per SIDE for brake shoes and 30 to 40 buck a piece on wheel cylinders.
I hope this helps the next guy... although there was already enough information here for anyone to find.
Just thought I would put it all together from a "this was my weekend" point of view.
Next is the emergency brake.... but...
Its gonna be a few days....
Best regards.
Blitz





 Reply With Quote

