Page 1 of 2 12 LastLast
Results 1 to 10 of 20

Thread: M725 windshield cowl weatherstrip installation

  1. #1
    Join Date
    Aug 2015
    Location
    Portlandia, Oregon USA
    Posts
    202

    Default M725 windshield cowl weatherstrip installation

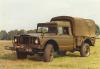
    My M725 ambulance windshield cowl weatherstrip is long overdue for replacement. It's currently in several pieces being held together with silicone caulk applied by the PO.
    It's sandwiched in there and since the windshield on the ambulance is fixed in place and won't hinge forward, I'm thinking the weatherstrip install is not straightforward or easy. What parts need to be removed first?
    I now have a new M715 weatherstrip, which looks like it is the same profile as the 725 weatherstrip - and looks like it will fit fine if I trim each end somewhat.
    I've searched here and found nothing on the installation of a new M725 windshield cowl weatherstrip.
    Anyone else changed one of these that can explain the process for me?

    Thanks
    Bryce
    1969 M725 ambulance

  2. #2
    Join Date
    Feb 2004
    Location
    Silver Lake Sand Dunes MI
    Posts
    1,491

    Default

    it does not look like it would be an easy swap. You'll have to drill out the rivets on the two end cap pieces and then it looks like unbolting the entire cab from the chassis and lifting it up to make room. You might get away with just taking out the front bolts and jacking it up some to slip it in place. Honestly it might just be easier to caulk and paint it rather then trying to replace it, and will not look much of a difference unless you are going for a 100 point restoration.
    Dave
    Delta Team Decals: http://www.deltateamdecals.com/

  3. #3
    Join Date
    Aug 2015
    Location
    Portlandia, Oregon USA
    Posts
    202

    Default

    Well, I know that my original message didn't get many takers (thanks Beast) . . . I know its a mundane topic, but I really do have to do something with the 50 year old weather stripping . . . .

    Hoping there are at least a couple of ambulance guys out there that can provide their experience/wisdom on this task . . . . .
    Thanks,
    Bryce
    1969 M725 ambulance

  4. #4
    Join Date
    Jan 2011
    Location
    Fernandina Beach, FL
    Posts
    3,689

    Default

    Bryce, I wish I could help you. I have an M715 so I don't have any answers. But I wanted you to know that we are listening to you. I just wish I had a answer. Hopefully one of the guys will know.

  5. #5

    Default

    No, not a mundane topic at all.
    It's just most of us don't have a M725, and have the experience to give.
    I have been scratching my head over your question for some time
    I'm still looking for a nice M725 to restore in the future, and am interested in your problem.

  6. #6
    Join Date
    Aug 2015
    Location
    Portlandia, Oregon USA
    Posts
    202

    Default A couple of ideas. . . .

    Maybe this will help get the conversation started . . .My thoughts fall into two camps:
    1. Come up with a replacement filler material. One that holds the cowl and windshield frame apart, allows some flex and movement of the two pieces and is UV and water proof and can be sealed with body seam sealer or butyl sealant. I'm thinking a piece of relatively dense black rubber matting in a thickness that essentially fills the space??/ (Think of the older heavy duty ruck bed mats that were sometimes 3/8"-1/2" thick). I could carve that up to fit and notch the rubber to fit around the three permanant bolts that go through that area that I describe below . . .

    2. Modify and use a new reproduction M715 cowl weatherstrip. In addition to trimming both ends of the M715 weatherstrip to fit that somewhat shorter space, the only other physical blockages are the three bolts that are welded to the cowl and go through the weatherstrip into the windshield frame. So . . . . I thought that if I slit the cab side of the gasket in those three places to slide in around the three bolts, that I might be able to work from the outside of the windshield to slide the new weatherstrip (slathered in butyl rubber weatherstrip sealant) into that space, without tearing into any of the riveted sheet metal transitions between Kaiser Jeep and ambulance cab body. That makes sense?

    Thoughts?
    Bryce
    1969 M725 ambulance

  7. #7
    Join Date
    Sep 2014
    Location
    Wichita Falls, TX
    Posts
    603

    Default

    I replaced the weatherstrip under my windshield last year. I was just looking through old pics seeing if I had shots of the bottom of the windshield frame.

    I remember that, even with the windshield folded down, that weatherstrip was a pain to get lined up correctly. It comes all folded up in a small box and didn't want to straighten up.

    And... It's a LOT of weatherstrip packed into a thin space. It's not solid rubber, it has a lot of ribs molded in and hollow spaces. But it's a lot taller than the gap between the windshield and cowl.
    And I believe the bottom of the windshield is inset and the molded weatherstrip is tucked inside that space.. and held in with a half dozen or so screws.

    I'm not sure one could get the old gasket out, much less stuff a new one in, without folding the windshield down.

    And don't forget your defrost ducts, if the gasket isn't lined up right they could be blocked.

    I'm not familiar with the changes they made for the M725. On my 724 all they did was slap together a POS roof and rivet it to the top of the windshield frame. Don't know anything about the 3 bolts.

    I've got a spare windshield frame in the shop... I was just too lazy to go look. I've got coffee in me now, I'll go look at it.

  8. #8
    Join Date
    Sep 2014
    Location
    Wichita Falls, TX
    Posts
    603

    Default

    Well, I was kinda wrong about it being inset. There is a lip on the inside facing. And it's 15 screws, not half dozen or so.


    Also got a shot of the side of my windshield, you can see the ribs and stuff all squished down.
    The first couple of times I lowered the windshield I thought I was going to bend the frame or break the glass trying to get it latched back into the upright position.


  9. #9
    Join Date
    Aug 2015
    Location
    Portlandia, Oregon USA
    Posts
    202

    Default

    Thanks for the pics VON.

    If the 725 windshield frame uses the same fasteners as the M715, I don't think my "slide in from the front" plan is going to work well at all.

    Maybe I need to post some pics of what I see on the 725 windshield frame

    So, those 15 screws went through the weatherstrip and held it in place?

    Bryce
    1969 M725 ambulance

  10. #10
    Join Date
    Sep 2014
    Location
    Wichita Falls, TX
    Posts
    603

    Default

    Quote Originally Posted by brycer1968 View Post
    Thanks for the pics VON.

    If the 725 windshield frame uses the same fasteners as the M715, I don't think my "slide in from the front" plan is going to work well at all.

    Maybe I need to post some pics of what I see on the 725 windshield frame

    So, those 15 screws went through the weatherstrip and held it in place?

    Bryce
    My thoughts too on the Slide it in plan.

    Yes, the screws go through holes in the weatherstrip and hold it in place. I thought I had taken more pics when I replaced mine (build thread at Planetisuzoo). I was hoping to show you how the gasket is molded... even without all the screws that'd be an almost impossible job to slide it in.
    ... maybe a few tubs of vaseline and a running start... no, not even then.

    I know nothing about the 725 body, but I'm guessing they used the 715 body from the cowl forward and the 715 windshield, then set the 725 body on the frame and screwed/riveted the roof to the windshield. Saves setup time and costs.

    If your windshield has the hinges on the sides and the latches on the inside then, to me anyway, that would confirm that.

    Unless your strip is so rotten that there's gaps and the windshield is unsupported under there, caulking/painting may be the only option that doesn't involve parting the roof from the windshield and jacking the body up. (there may be enough flex that you could lift the roof without lifting the body.. I dunno)

    Oooh... If it IS that rotten you might be able to chip some old stuff out around the screws, then stuff some filler blocks cut from some horse stall pads or something in there to support the frame. Then caulk it up.

    Oooh... again. If you're determined to replace it... Instead of parting the roof/windshield frame, it might be easier to remove the doors, unbolt the windshield hinges and unbolt the body from the frame and lift until you have the clearance to get to the 15 screws and replace the gasket.
    Only reason I think that might be easier is because of not having to reseal the roof to the windshield frame. And removing the body isn't that big a deal if you've got the means to actually do the lifting/jacking.

Posting Permissions

  • You may not post new threads
  • You may not post replies
  • You may not post attachments
  • You may not edit your posts
  •  


Site Upgrade, Design Modifications & Administrative Support by:
Palm River Enterprises LLC, IT Solutions
President: Tom King, User ID=teking
This site is owned and operated by:
M715 Zone, LLC
President: Jon Schmidt, User ID=brute4c


If you have any suggestions, comments, problems or questions, contact:  brute4c@m715zone.com
Use of this site means you understand and agree to our TERMS OF USE

Copyright Notice:
This web site is subject to the protection of the copyright laws of the United States and other countries. Except for Personal Use Only, you may not modify, copy, distribute, transmit, display, perform, reproduce, publish, license, create derivative works from, transfer, or sell any information obtained from any part of the M715 Zone website without the prior written permission of M715 Zone, LLC. Written permission can only be obtained by contacting brute4c@m715zone.com

Copyright 1998-2024