Page 42 of 47 FirstFirst ... 32333435363738394041424344454647 LastLast
Results 411 to 420 of 470

Thread: The longest build thread ever, at least it seems like it!

  1. #411

    Default

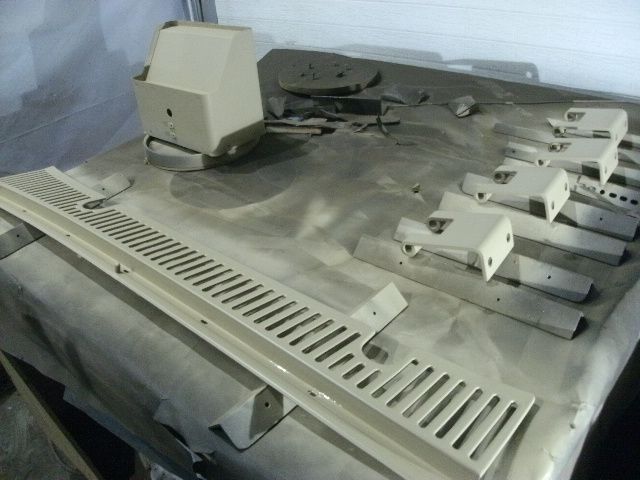
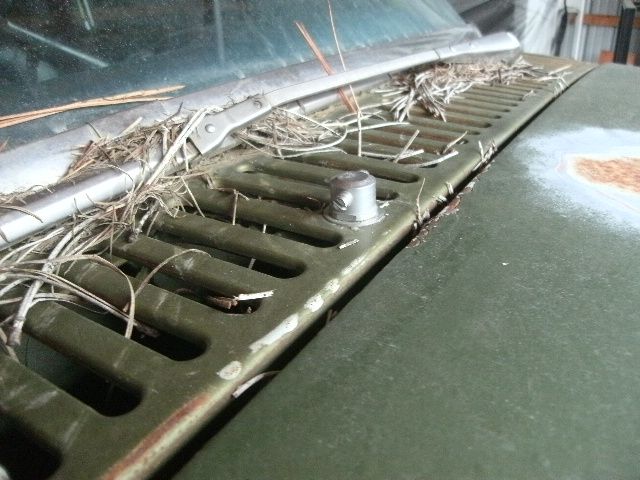
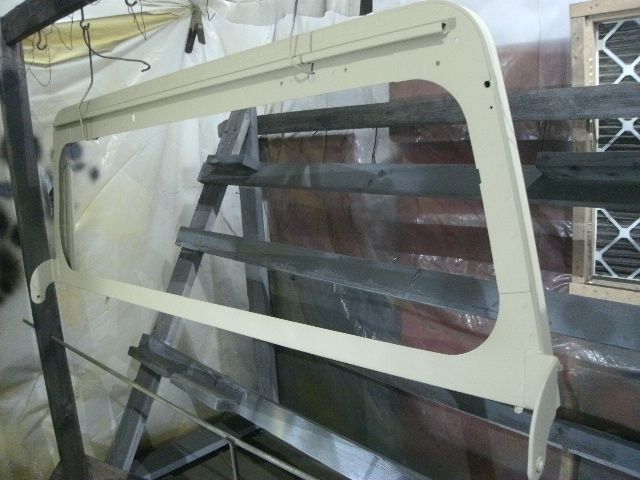
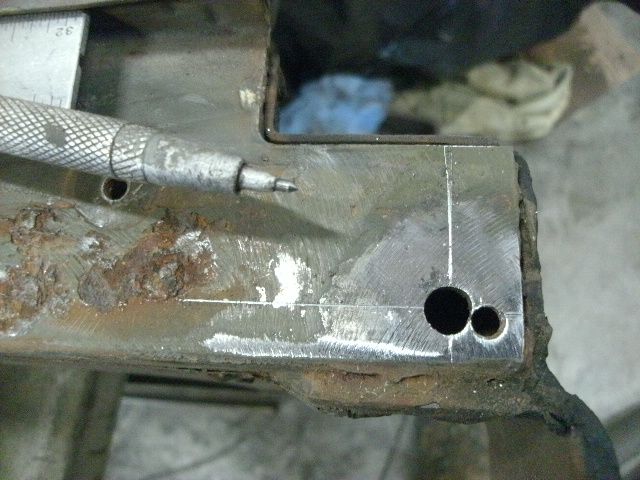
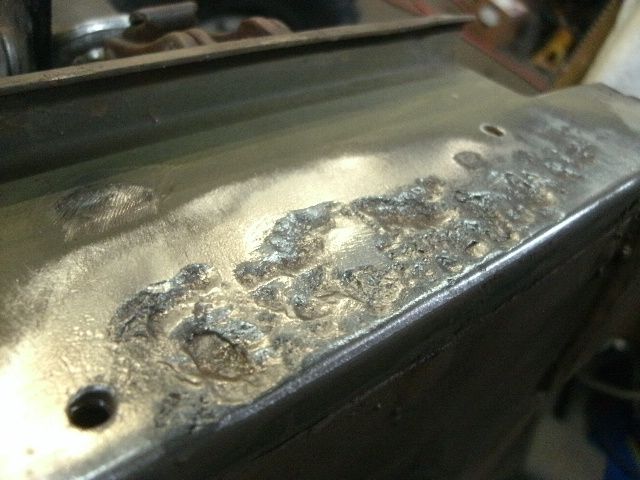
    The windshield is painted and drying. Lots and lots of work on it. 22 holes got welded up from hard top installs. 24 holes if you include the oversize hole and the one drilled next to it. On the bottom side for the base gasket to cowl seal. I run cross hairs and weld it back up. Then retrace the cross hairs and center punch it for a new correct size hole. There was also a bad rust patch from water sitting there.


    Terrible rust and the only real bad spot. I welded every bit of this back. I also ruined a whole tungsten rod from blow back. I hate this type of repair. Grind your tungsten and instantly ruin it.


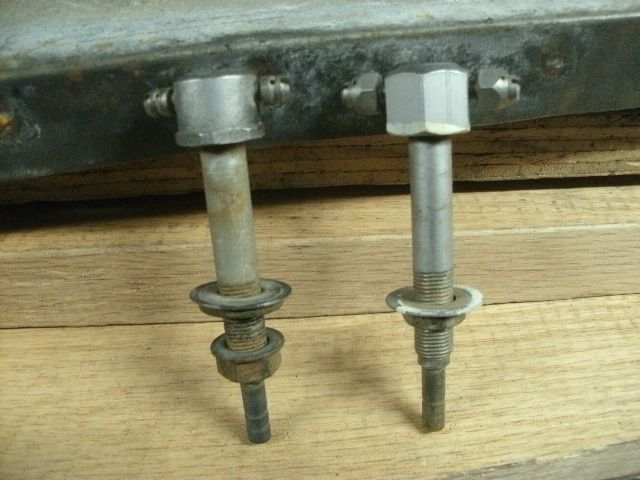
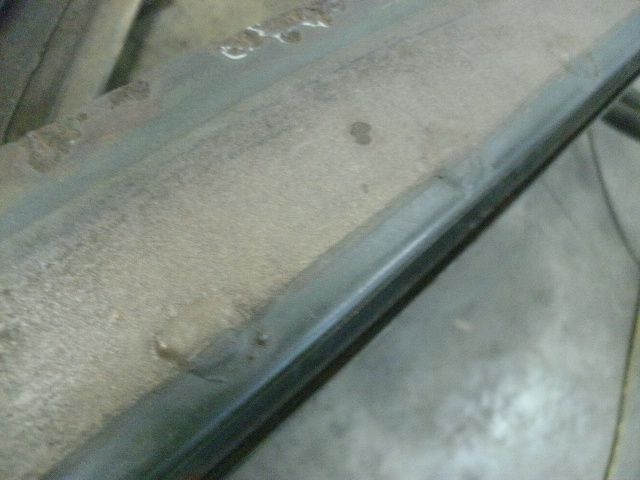
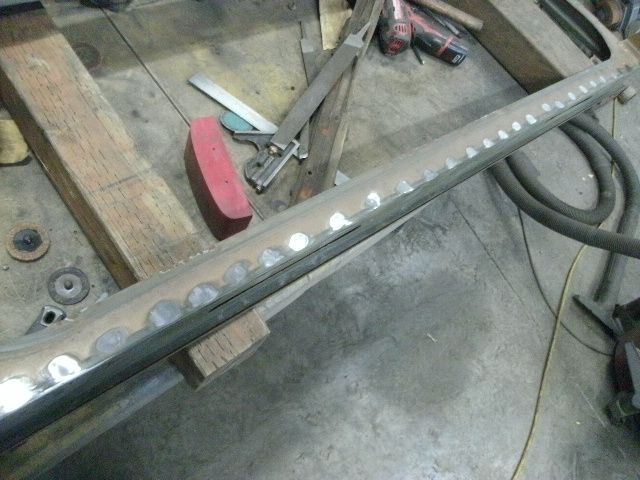
    So the great big plug welds on the windshield frame cause leaks. The big lumps hold the lower gasket off the windshield frame and allow water to get in on the sides of the welds. I decided to grind and sand all of them off and give a flat surface for the gasket to seal against. This is my attempt to stop lower cowl gasket water leaks. Ok everybody can stop laughing now. I will try.
    See the welds and gasket lines?


    All gone.


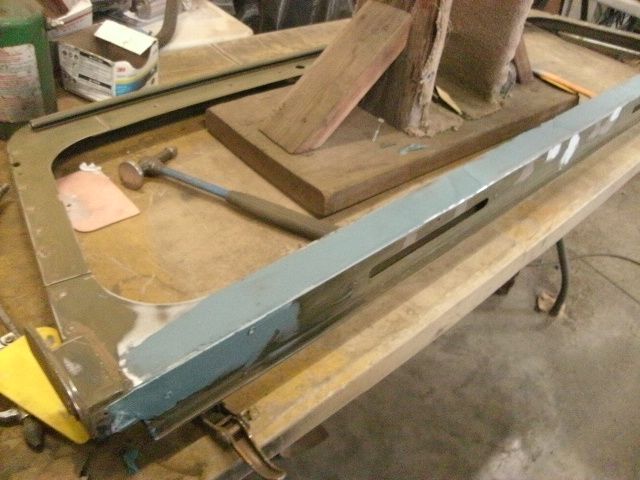
    A skim coat of putty for a super flat seal surface.


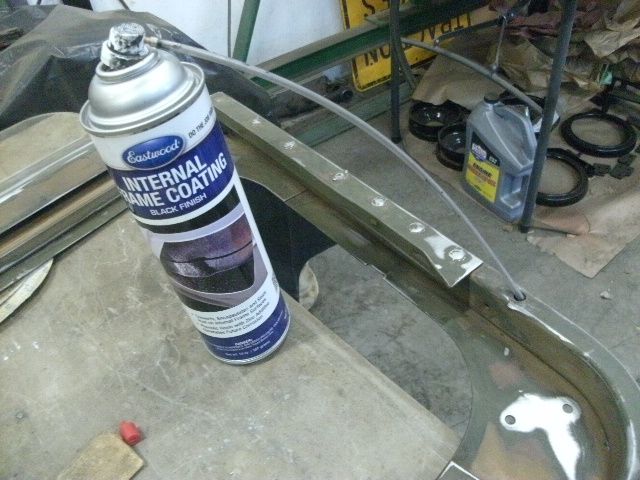
    I coated the inside of every cavity with some left over internal frame paint.


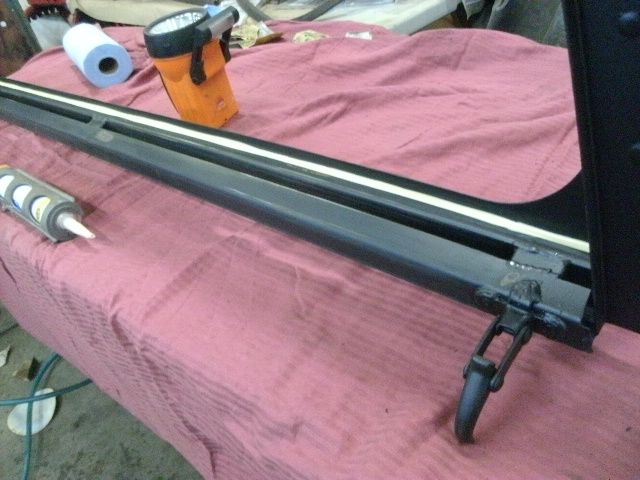
    Primered and some seam seal where it was needed.


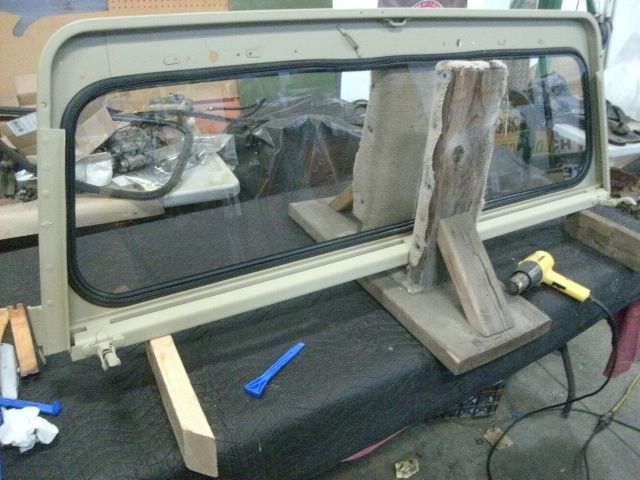
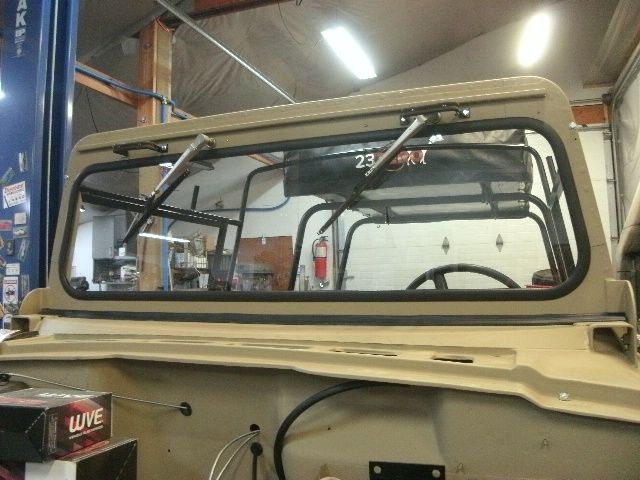
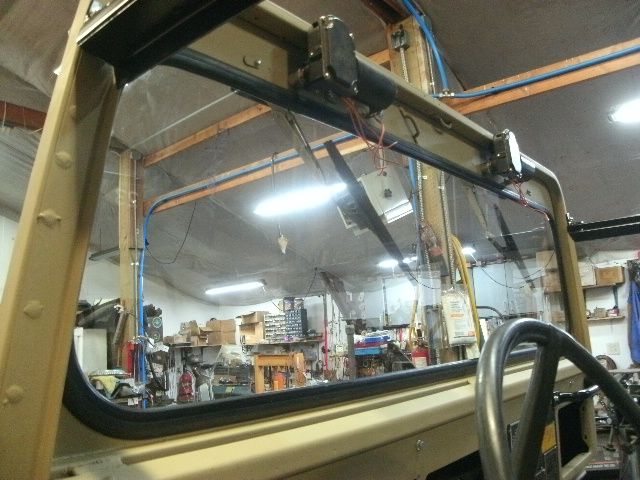
    It is done. Now to let it dry for a few days then comes reassembly. I hope the glass goes well. It had better. This glass is thicker than what you can get now. No coffee that day.

    Last edited by Kaiserjeeps; February 15th, 2024 at 12:31 PM.
    Liz, covid, murdered 10/19/21

  2. #412

    Default

    Some other parts got sprayed too. The hole in the glove box top is for a LED light. Hey it is a restomod..


    Onward.
    Liz, covid, murdered 10/19/21

  3. #413

    Default

    I forgot to post this. This is a full size jeep washer nozzle found in wagoneers and J trucks.


    They go dead center right behind the alignment pin. These alignment pins are not on FSJ's and are specific to M trucks only.


    The M715 cowl is not drilled for this. I am doubting if the spray from each hole would reach where it needs to. EDIT::: The flat windshield of the m truck is a little closer in the spray contact area and the sloped glass of a FSJ is actually back far enough for the spray pattern to spread out. I need to hook up one of these nozzles to see how far it spreads and at what distance. No point in installing something that does not spray in the wiper path. It appears there might be room to install two and spread them apart by several inches. The lower stamping of the cowl visible from the engine bay, shows this might be possible. EDIT::: not enough room to obtain a good spread of two nozzles. Especially on the drivers side. I am also going to try and locate single jets that could be attached to the grill. I have some somewhere...geez. More on this later.
    Last edited by Kaiserjeeps; February 16th, 2024 at 01:57 AM.
    Liz, covid, murdered 10/19/21

  4. #414
    Join Date
    Nov 2009
    Location
    Greenwood, Indiana
    Posts
    1,704

    Default

    Quote Originally Posted by Kaiserjeeps View Post
    I will have a look tomorrow and see if the FSJ single post dual spray head might work. I am pretty sure I have an extra for you George. Hey Jon, did you use what I am describing or did you use two individual spray nozzles in front of each side? The wag or J truck nozzles go dead center just behind the hood. I am not sure they will spread far enough apart for a flat windshield.
    That’s awesome, thank you!
    Thanks, George
    Joshua 24:15

  5. #415
    Join Date
    Nov 2009
    Location
    Greenwood, Indiana
    Posts
    1,704

    Default

    Great progress! I am saving the windshield and frame for last
    Thanks, George
    Joshua 24:15

  6. #416

    Default

    I can't mention how long it took to see which side the lock strip went on. I checked the online manuals and didn't really find much. I figured it went on the inside and after searching this thread's first couple pages, I got my confirmation. So I got the glass in and I did not break it. It was actually a loose fit. I bedded in the bottom and sides with some never drying paintable flexible caulking. I also heated the glass with a heat gun from a distance to at least have it be somewhat warm. And kept putting silicone spray on the lock strip as I worked around the frame. Glad to have this behind me.


    Got the wipers in and put some of the same caulking on the top side of the new cowl gasket in the upper channel just behind the front lip edge. It is looking like a truck now. I hooked up a battery to the wipers and parked them. To put the arms and blades on. Then the hood supports with new welting. Moving onward to the front sheetmetal soon.


    Liz, covid, murdered 10/19/21

  7. #417
    Join Date
    Nov 2009
    Location
    Greenwood, Indiana
    Posts
    1,704

    Default

    Looking good Al. I don’t know if I will do the windshield myself. What a task
    Thanks, George
    Joshua 24:15

  8. #418

    Default

    It was not bad George. Actually the glass could have been just a shade bigger. The corners are almost not covered. I had some paintable flexible non drying round strips of eastwood caulking left over. I rolled the near pencil diameter strips down to a much smaller and longer piece. I tucked it into the lower glass channel and ran it up the sides and stopped by the upper corners. Then I used a very wet silicone dampened rag and ran it all the way around the lock strip and the grove it needed to sink into. The gasket kind of soaked it up and I had to reapply it as I went. I had the stand you see and after cleaning the glass very well I tucked in the lower edge in the gasket. Looking at each side I was able to center it by looking at each lower corner. Then with gloves on and some silicone spray and a blue shop towel I used two PLASTIC trim tools to pry up the lock strip upper lip while pushing down on the lock strip to tuck it in and under the lip. Then slowly moving in the direction I chose. One trim tool was a pretty small round tip about a 1/2 inch wide. The one I pushed the lock strip in was a wide blade about 1.2 inches wide. If it had silicone on all of it including the tools, it went slow but sure. I decided to heat the glass evenly just a bit. My shop is cold and hard to heat for anything like paint or ?? I just got the glass warm. I believe that helps it flex. I did not see any real flexing. It seemed to go very well. Despite a not very warm shop, I ended up in a Tee shirt and it made me sweat some. I was pretty glad to do the last 3 inches... I had the stand to get it started. But laid it flat by the time I got across one side of the bottom. Gravity assist... Keep working all the way around by pulling the lock strip lip off the edge of the glass and flip it up so it lays on the glass. This made a difference in how easy the tools progressed. One thing I noted... The glass appeared to have been cut out of a big sheet with dull rocks. The edges were a mess of chips and ragged cuts. I will pretend I never saw that. Anyway.. My 18 cents worth adjusted from .02 cents for the bidenomics conversion. I am just kidding for all you 3 letter agency types.
    Liz, covid, murdered 10/19/21

  9. #419
    Join Date
    Nov 2009
    Location
    Greenwood, Indiana
    Posts
    1,704

    Default

    Thanks for the detail Al. What did the piece of glass run you?
    Thanks, George
    Joshua 24:15

  10. #420
    Join Date
    Sep 1998
    Location
    North Central Wisconsin
    Posts
    11,529

    Default

    Al...you are seriously committed in a great way! Wish I had half the time at home that it takes to do that stuff...gone 6 days a week coming up to the 5th week in a row...gets tiring...i hope to win the lottery soon so I can get off the road and get some stuff I want to do done...like you are!

    Keep it coming...great stuff!
    Lord send your Holy Ghost into our hearts and make the desire of our hearts Your Will.

    Pro-choice, that's a LIE, babies don't choose to die!!

Posting Permissions

  • You may not post new threads
  • You may not post replies
  • You may not post attachments
  • You may not edit your posts
  •  


Site Upgrade, Design Modifications & Administrative Support by:
Palm River Enterprises LLC, IT Solutions
President: Tom King, User ID=teking
This site is owned and operated by:
M715 Zone, LLC
President: Jon Schmidt, User ID=brute4c


If you have any suggestions, comments, problems or questions, contact:  brute4c@m715zone.com
Use of this site means you understand and agree to our TERMS OF USE

Copyright Notice:
This web site is subject to the protection of the copyright laws of the United States and other countries. Except for Personal Use Only, you may not modify, copy, distribute, transmit, display, perform, reproduce, publish, license, create derivative works from, transfer, or sell any information obtained from any part of the M715 Zone website without the prior written permission of M715 Zone, LLC. Written permission can only be obtained by contacting brute4c@m715zone.com

Copyright 1998-2024