Page 1 of 2 12 LastLast
Results 1 to 10 of 19

Thread: Flasher/turn signal bulb

  1. #1
    Join Date
    Jun 2009
    Location
    Mt. Prospect, Illinois 60056
    Posts
    2,299

    Default Flasher/turn signal bulb

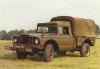
    Is the number on the flasher/turn signal bulb 1681? Had a devil of a time removing all three bulbs in left rear light housing. Had to break two small bulbs and twist out base with needle nose pliers. Cleaned up all corrosion with WD40 and emery cloth in sockets. Driving and blackout work fine, need to go to Napa for 24 volts large bulb. Not sure how moisture got into light housing tho. Rubber seal seems to be in fine shape. If I'm correct the number on the large bulb appears to be 1681.
    militarypotts Spec/4 Military Police, Vietnam Era, "Does the noise in my head bother you? Welcome to the Twilight Zone!"

  2. #2
    Join Date
    Jan 2011
    Location
    Fernandina Beach, FL
    Posts
    3,689

    Default

    Glad that you got the bulbs out. That is the way to do it. Maybe the moisture got in around the seal around the wires where they enter from the back of the housing.

  3. #3
    Join Date
    Jul 2007
    Location
    Rhoadesville, Virginia (five miles from no place)
    Posts
    5,125

    Default

    Here is a conversion chart that lists many of the bulb numbers:

    http://www.m715zone.com/vb/pages/man...rsionChart.pdf

    Almost every light housing I've had apart had some evidence of water intrusion. Either the seal around the front or the seal around the wiring. Just thank goodness you were able to get the screws out on the front. Usually at least one or two break off in the housing. Use a liberal helping of bulb grease on the sockets and be sure to anti-sieze the cover screws when you re-install them. It will save you a lot of headache later down the road.
    "Free advice is worth what you pay for it."™

  4. #4
    Join Date
    Jun 2009
    Location
    Mt. Prospect, Illinois 60056
    Posts
    2,299

    Default

    Sometimes breaking the bulb and using a needle nose pliers is the only way. I cleaned all the sockets with emery cloth. Both blackout and driving light work great. Tommorrow I'll go to Napa and pick up the other bulb. Some di-electric grease on the bulb base is in order for future removal.
    militarypotts Spec/4 Military Police, Vietnam Era, "Does the noise in my head bother you? Welcome to the Twilight Zone!"

  5. #5
    Join Date
    Jan 2011
    Location
    Fernandina Beach, FL
    Posts
    3,689

    Default

    Quote Originally Posted by militarypotts View Post
    ...
    Some di-electric grease on the bulb base is in order for future removal.
    Yes, for sure. The care manufacturers used it for years with metal base bulbs. I looks like a thick Lubriplate-type of grease. Always an issue with dissimilar metals and moisture. It sets up electrolysis and therefore corrosion. Steel sockets and brass or aluminum based bulbs.

  6. #6
    Join Date
    Dec 2003
    Location
    Giddings, Texas
    Posts
    7,732

    Default

    Use thread lube on the cover screws as well. Stainless does not like to move inside aluminum.
    Remember if you didn't build it you can't call it yours.

    6.2 powered M715, 5 M1009's, M416, 2 M101's, 2 M105's, 3 M35's, M1007 6.5 turbo Suburban project called Cowdog.

    https://www.youtube.com/channel/UCCz...HGkBCfhXZ5iuaw

  7. #7
    Join Date
    Sep 2010
    Location
    Middleville, mi.
    Posts
    1,245

    Default

    Quote Originally Posted by militarypotts View Post
    Had to break two small bulbs and twist out base with needle nose pliers. Cleaned up all corrosion with WD40 and emery cloth in sockets. Not sure how moisture got into light housing tho. Rubber seal seems to be in fine shape.
    Could it be condensation and not actual water seepage?

    In the security industry we often have to pressurize camera housings with nitrogen to prevent the lens from condensation. The camera generates heat the same as a light bulb would. If the housing (which is sealed from the elements) isn't pressurized we have problems in humid areas.

  8. #8
    Join Date
    Jun 2009
    Location
    Mt. Prospect, Illinois 60056
    Posts
    2,299

    Default

    That all sounds like good advise. I may even remove the other side and do the same thing. Makes it easier the next time around. Thanks guys.
    militarypotts Spec/4 Military Police, Vietnam Era, "Does the noise in my head bother you? Welcome to the Twilight Zone!"

  9. #9
    Join Date
    Jan 2011
    Location
    Fernandina Beach, FL
    Posts
    3,689

    Default

    I have tried briefly to remove the screws in the front lights of my truck. They didn't want to move so I left them alone for now. But I intend to work at it and do some preventative maintenance on them. I would rather do a preventative repair at my convenience rather than when it is inconvenient. I think you are right, check it out. And after you go to the trouble of getting it apart, I think new bulbs are in order. I do the same on the vehicles at home. One bulb goes out, replace it and all of the others in the same cluster as well while you have it apart.

  10. #10
    Join Date
    Dec 2003
    Location
    Giddings, Texas
    Posts
    7,732

    Default

    Penetrating oil is your friend on the light covers. To get 8 good covers for my 715 and Gasser M35. I think I collected over 30 buckets. Lots of parts and pieces had to be combined to get the 8 I needed. Looking back, it wasn't worth my time. I should have just bought the brand new ones from New Star.

    I have had standing water inside them, slime inside, sever oxidation inside and lots of rust too. It just depends on how good the O-ring is, how tight the screws are, how good the wire grommet is and of course what Soldier B was doing when he last put it together. One of mine had a corn chip inside!
    Remember if you didn't build it you can't call it yours.

    6.2 powered M715, 5 M1009's, M416, 2 M101's, 2 M105's, 3 M35's, M1007 6.5 turbo Suburban project called Cowdog.

    https://www.youtube.com/channel/UCCz...HGkBCfhXZ5iuaw

Posting Permissions

  • You may not post new threads
  • You may not post replies
  • You may not post attachments
  • You may not edit your posts
  •  


Site Upgrade, Design Modifications & Administrative Support by:
Palm River Enterprises LLC, IT Solutions
President: Tom King, User ID=teking
This site is owned and operated by:
M715 Zone, LLC
President: Jon Schmidt, User ID=brute4c


If you have any suggestions, comments, problems or questions, contact:  brute4c@m715zone.com
Use of this site means you understand and agree to our TERMS OF USE

Copyright Notice:
This web site is subject to the protection of the copyright laws of the United States and other countries. Except for Personal Use Only, you may not modify, copy, distribute, transmit, display, perform, reproduce, publish, license, create derivative works from, transfer, or sell any information obtained from any part of the M715 Zone website without the prior written permission of M715 Zone, LLC. Written permission can only be obtained by contacting brute4c@m715zone.com

Copyright 1998-2024